Stream from RudderStack
In this guide, you'll learn two different methods to send events from RudderStack to Tinybird.
To better understand the behavior of their customers, companies need to unify timestamped data coming from a wide variety of products and platforms. Typical events to track would be 'sign up', 'login', 'page view' or 'item purchased'. A customer data platform can be used to capture complete customer data like this from wherever your customers interact with your brand. It defines events, collects them from different platforms and products, and routes them to where they need to be consumed.
RudderStack is an open-source customer data pipeline tool. It collects, processes and routes data from your websites, apps, cloud tools, and data warehouse. By using Tinybird's event ingestion endpoint for high-frequency ingestion as a Webhook in RudderStack, you can stream customer data in real time to Data Sources.
Option 1: A separate Data Source for each event type
This is the preferred approach. It sends each type of event to a corresponding Data Source.
This 2-minute video shows you how to set up high-frequency ingestion through RudderStack using these steps.
The advantages of this method are:
- Your data is well organized from the start.
- Different event types can have different attributes (columns in their Data Source).
- Whenever new attributes are added to an event type you will be prompted to add new columns.
- New event types will get a new Data Source.
Start by generating a Token in the UI to allow RudderStack to write to Tinybird.
Create a Tinybird Token
Go to the Workspace in Tinybird where you want to receive data and select "Tokens" in the side panel. Create a new Token by selecting "Create Token" (top right).
Give your Token a descriptive name. In the section "DATA SOURCES SCOPES" mark the "Data Sources management" checkbox (Enabled) to give your Token permission to create Data Sources. Select "Save changes".
Create a RudderStack Destination
In RudderStack, Select "Destinations" in the side panel and then "New destination" (top right).
Select Webhook:
- Give the destination a descriptive name.
- Connect your source(s), you can test with the Rudderstack Sample HTTP Source.
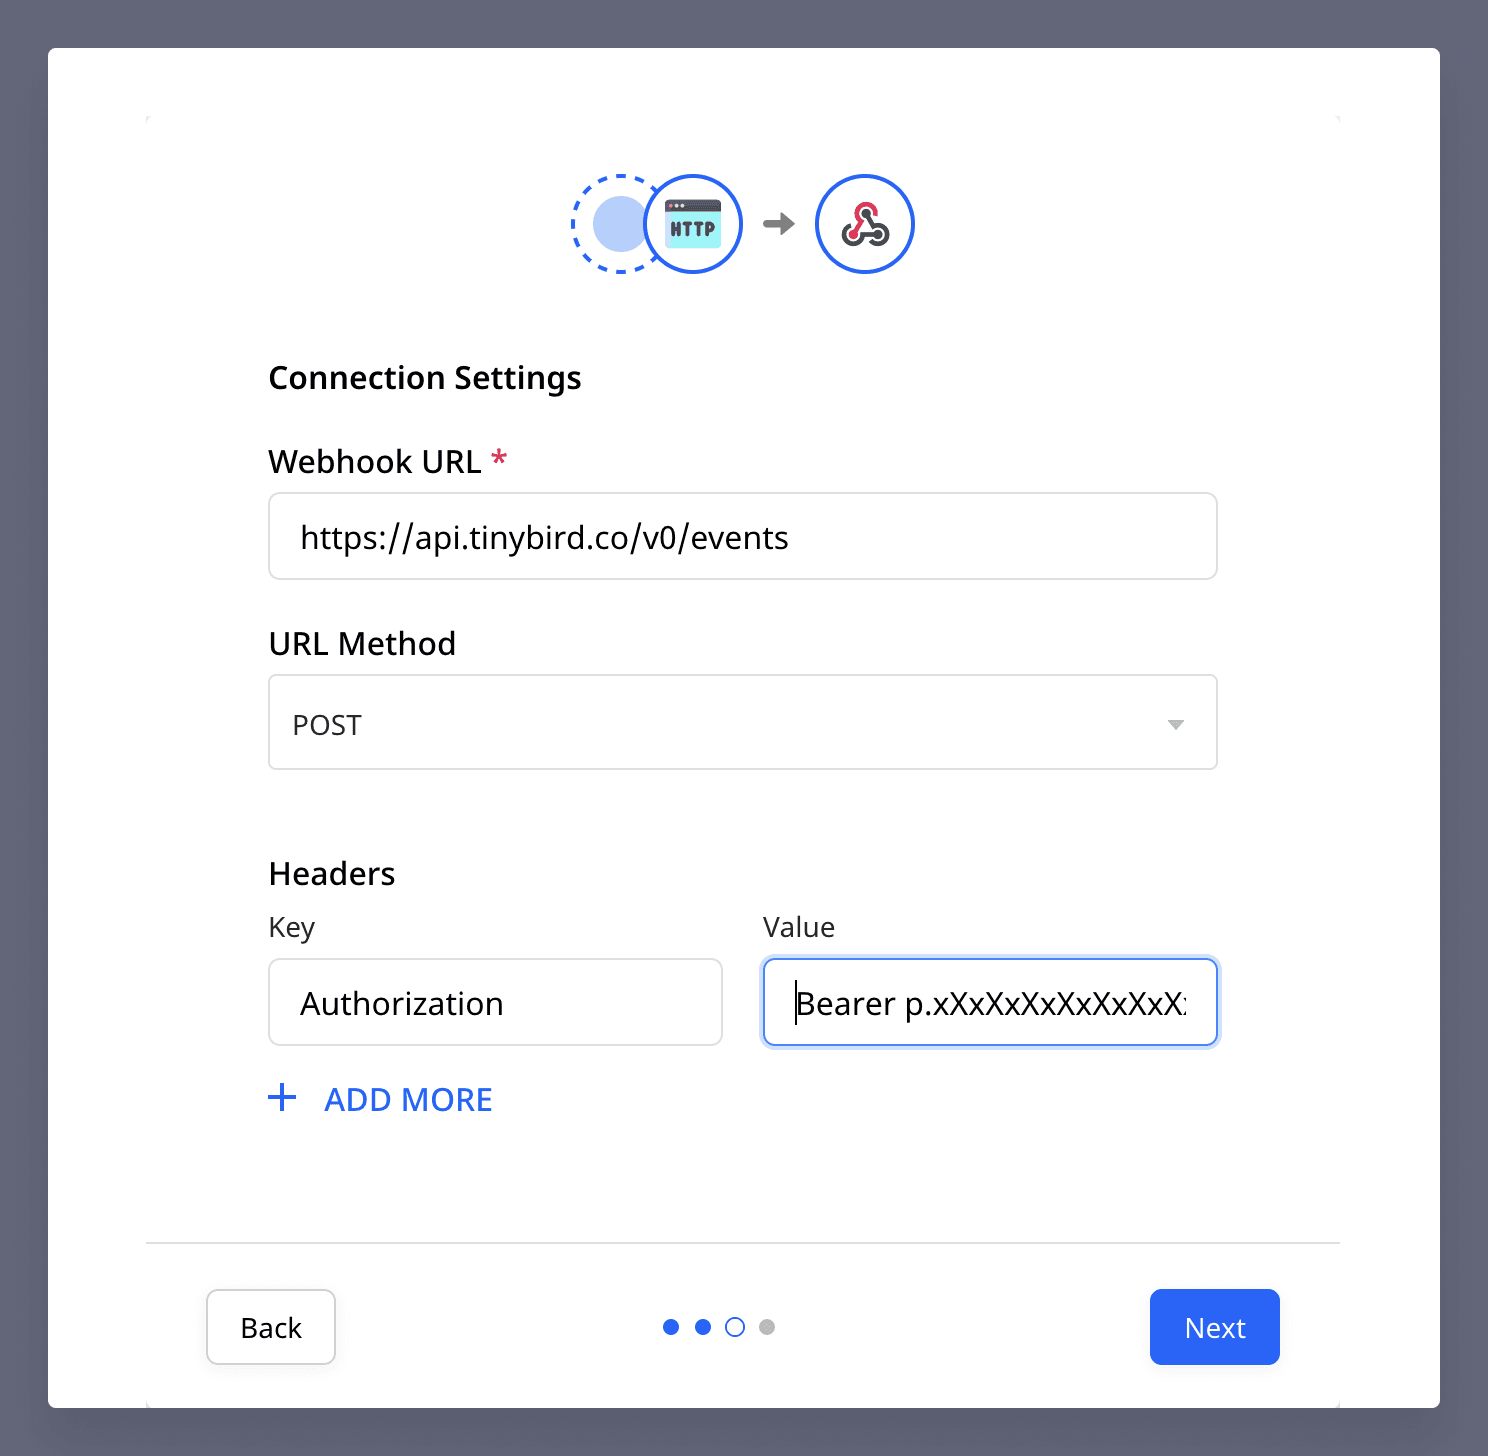
- Input the following Connection Settings:
- Webhook URL: <https://api.tinybird.co/v0/events>
- URL Method: POST
- Headers Key: Authorization
- Headers Value: Bearer TINYBIRD_AUTH_TOKEN
On the next page, select "Create new transformation".
You can code a function in the box to apply to events when this transformation is active using the example snippet below (feel free to update it to suit your needs). In this function, you can dynamically append the target Data Source to the target URL of the Webhook. Give your transformation a descriptive name and a helpful description.
Transformation code
export function transformEvent(event, metadata){
    event.appendPath="?name=rudderstack_"+event.event.toLowerCase().replace(/[\s\.]/g, '_')
    return event;
}
This example snippet uses the prefix *rudderstack\_* followed by the name of the event in lower case, with its words separated by an underscore (for instance, a "Product purchased" event would go to a Data Source named rudderstack_product_purchased).
Save the transformation. Your destination has been created successfully!
Test Ingestion
In Rudderstack, select Sources --> Rudderstack Sample HTTP --> Live events (top right) --> "Send test event" and paste the provided curl command into your terminal. The event will appear on the screen and be sent to Tinybird.
If, after sending some events through RudderStack, you see that your Data Source in Tinybird exists but is empty (0 rows after sending a few events), you will need to authorize the Token that you created to append data to the Data Source. In the UI, navigate to "Tokens", select the Token you created, select "Data Sources management" --> "Add Data Source scope", and choose the name of the Data Source that you want to write to. Mark the "Append" checkbox and save the changes.
Option 2: All events in the same Data Source
This alternative approach consists of sending all events into a single Data Source and then splitting them using Tinybird. By pre-configuring the Data Source, any events that RudderStack sends will be ingested with the JSON object in full as a String in a single column. This is very useful when you have complex JSON objects as explained in the ingesting NDJSON docs but be aware that using JSONExtract to parse data from the JSON object after ingestion has an impact on performance.
New columns from parsing the data will be detected and you will be asked if you want to save them. You can adjust the inferred data types before saving any new columns. Pipes can be used to filter the Data Source by different events.
The following example assumes you have already installed the Tinybird CLI. If you're not familiar with how to use or install it, read the CLI docs.
Pre-configure a Data Source
Authenticate to your Workspace by typing tb auth and entering your Token for the Workspace into which you want to ingest data from RudderStack.
Create a new file in your local Workspace, named rudderstack_events.datasource, for example, to configure the empty Data Source.
Data Source schema
SCHEMA >
'value' String 'json:$'

ENGINE "MergeTree"
ENGINE_SORTING_KEY "value"
Push the file to your Workspace using tb push rudderstack_events.datasource.
Note that this pre-configured Data Source is only required if you need a column containing the JSON object in full as a String. Otherwise, just skip this step and let Tinybird infer the columns and data types when you send the first event. You will then be able to select which columns you wish to save and adjust their data types. Create the Token as in method 1.
Create a Tinybird Token
Go to the Workspace in Tinybird where you want to receive data and select "Tokens" in the side panel. Create a new Token by selecting "Create Token" (top right).
Give your Token a descriptive name. In the section "DATA SOURCES SCOPES", select "Add Data Source scope", choose the name of the Data Source that you just created, and mark the "Append" checkbox. Select "Save changes".
Create a RudderStack Destination
In RudderStack, Select "Destinations" in the side panel and then "New destination" (top right).
Select Webhook:
- Give the destination a descriptive name.
- Connect your source(s), you can test with the Rudderstack Sample HTTP Source.
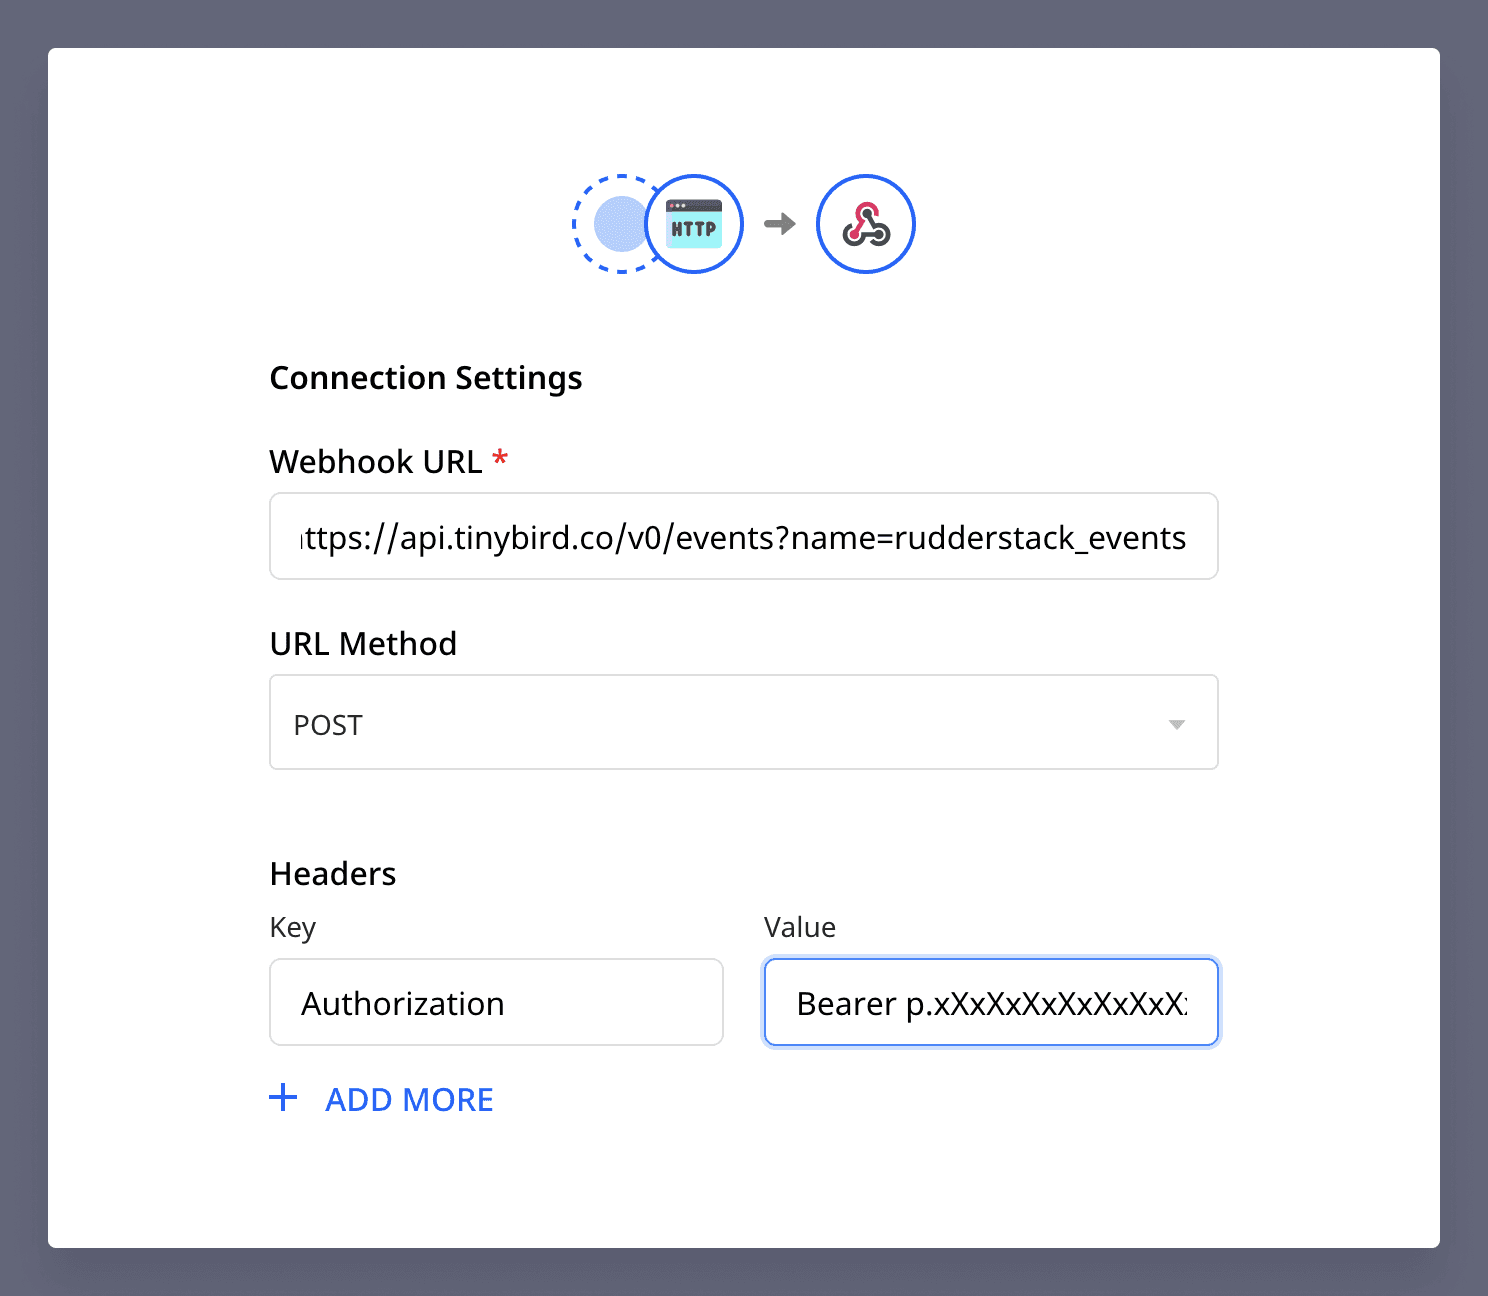
- Input the following Connection Settings:
- Webhook URL: <https://api.tinybird.co/v0/events?name=rudderstack_events>
- URL Method: POST
- Headers Key: Authorization
- Headers Value: Bearer TINYBIRD_AUTH_TOKEN
Select 'No transformation needed' and save. Your destination has been created successfully!
Test Ingestion
Select Sources --> Rudderstack Sample HTTP --> "Live events" (top right) --> "Send test event" and paste the provided curl command into your terminal. The event will appear on the screen and be sent to Tinybird.
The value column contains the full JSON object. You will also have the option of having the data parsed into columns. When viewing the new columns you can select which ones to save and adjust their data types.
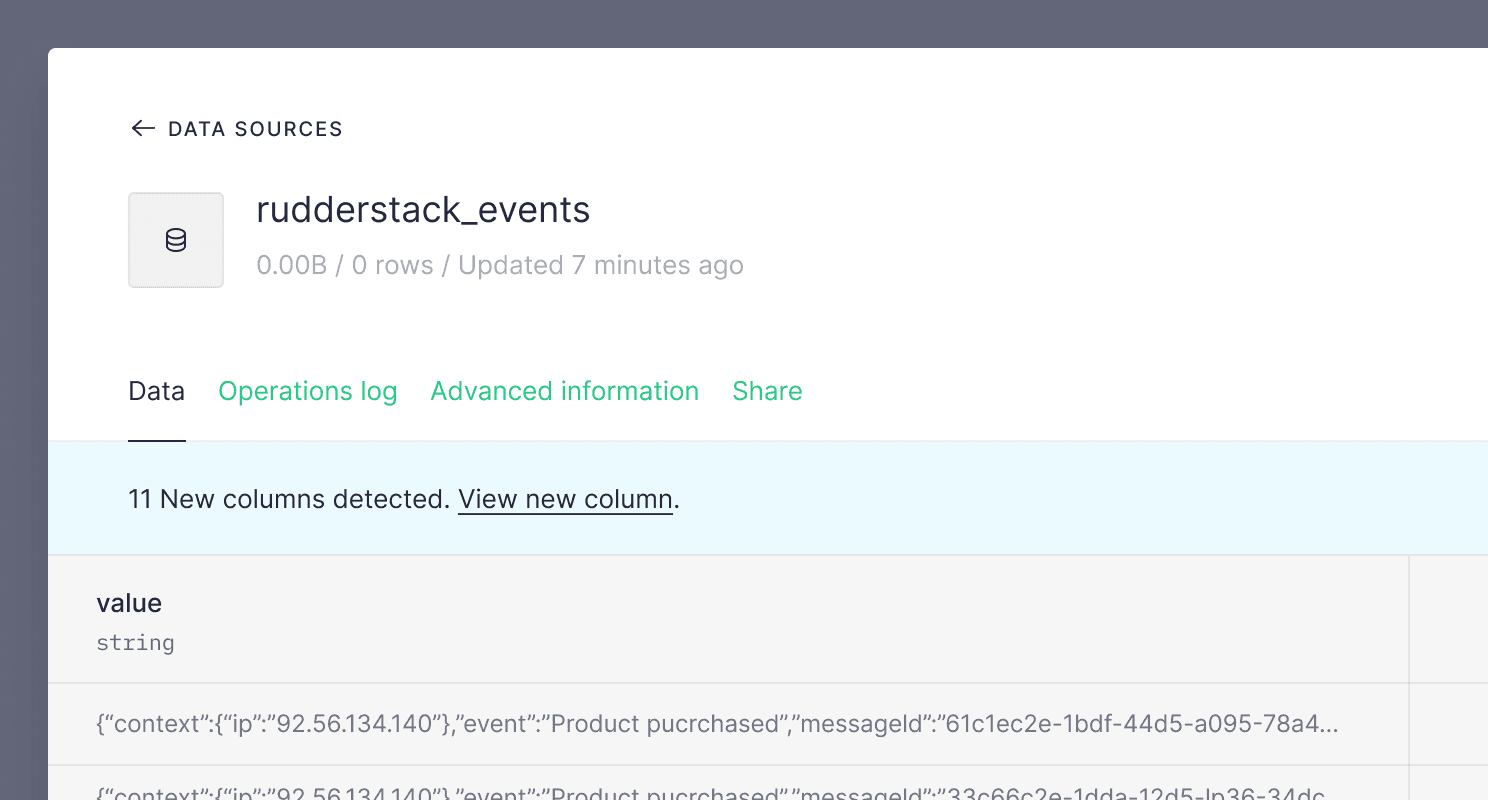
Whenever new columns are detected in the stream of events you will be asked if you want to save them.
Next steps
- Need to iterate a Data Source, including the schema? Read how here.
- Want to schedule your data ingestion? Read the docs on cron and GitHub Actions.